|
Philips Residium FGS 224
Genre: Enclosed Horizontal Traverse Compact Fluorescent Lantern
By the 1980s, the fluorescent street lighting lantern was becoming a rarity. Installed on the wave
of post-war rebuilding, the original fluorescent tube (born during the war years) was an exciting
and practical light source for the 1950s and 1960s. Although far more expensive than lanterns
for other bulb types, the fluorescent lantern offered a natural warm light and a wide beam
which was good in both the wet and dry. Unfortunately these multiple tube monsters sucked
up too much power, were too complex to keep running and simply cost too much to maintain.
Throw in the energy crisis of the 1970s and fluorescent street lighting had only limited
time left on the streets of the UK.
In the late 1980s, a new technology resulted in the development of the
compact fluorescent tube. With lower wattages and higher efficacies, the
new tubes could put out the same light output as multiple older tubes. Coupled
with advances in smaller electrical ballasts and a rethink in street lighting
theory (concerning the merits of scoptic versus photopic vision), white lighting
was back in vogue, and the new slimline fluorescent was one of the contenders
for a new range of lanterns.
Although the lanterns would still be large, the issues with multiple tubes, large
bulky gear and wiring complexity were all solved. Gradually, fluorescent (in the guise
of compact fluorescent) started reappearing on the streets in new, specially designed lanterns.
Name: Philips Residium FGS 224
Date: 2000s -
Dimensions: Length: 752mm, Width: 235mm, Height: 182mm
Light Distibution: Cut-Off? Conforms with BS 5489-1 / EN 13201.
Lamp: PL-L 36W (36W and 55W SOX-E options also available).
History
 With the return of the fluorescent tube for street lighting in the form of the linear fluorescent lamp,
Philips were quick to build a lantern around this new light source. (Interestingly Philips weren't
strong with fluorescent lighting in the 1960s to 1980s in the UK and seemed to concentrate more on LPS and HPS lighting solutions).
With the return of the fluorescent tube for street lighting in the form of the linear fluorescent lamp,
Philips were quick to build a lantern around this new light source. (Interestingly Philips weren't
strong with fluorescent lighting in the 1960s to 1980s in the UK and seemed to concentrate more on LPS and HPS lighting solutions).
The Residium family was the result. Three lanterns were available: the FGS 223 (which took the smaller
24W PL-L fluorescent tube) , the longer FGS 224 (which took a 36W PL-L fluorescent tube) and the
FGS 225 (designed for the 80W PL-L option).
Its styling was based on an elongated Malaga (SGS 101). The lanterns shared the same basic shoe design,
canopy profile and clips. Another strong inspiration was the classic Philips LPS series of lanterns (MA50, MA60 and
MA90) which influenced the shape of the bowl. (Not surprising as the linear fluorescent and LPS bulb
have similar dimensions and optics).
As the dimensions and optics of the PL-L and LPS lamps were similar, the lantern could also accept LPS tubes.
This meant the Residium was also the natural successor of the popular Philips LPS range of
lanterns (including the semi-cut-off MI26 and MI36 models).
Popularity
The Residium has ridden the wave of the renewed popularity of the linear fluorescent lamp
and the current vogue of white-light installations. Therefore it�s becoming more popular in the UK, often
replacing old LPS installations in side-streets.
Identification
There are no external Philips logos on the lantern (although there are plenty of stickers inside the lantern
to positively identify it). But the lantern can be identified by its classic Philips styling; the distinct
design of the shoe (shared with the Malaga) and the profile of the canopy and bowl.
Optical System
The optics are based on the familiar cross-over principle with the lamp mounted high in the lantern and
the flux directed by two polished lacquered steel plates. The lantern family can accommodate
24W � 80W PL-L lamps (and 35W SOX, 55W SOX and 66W SOX-E lamps respectively).
The Philips Residium FGS 224 In My Collection
|
|
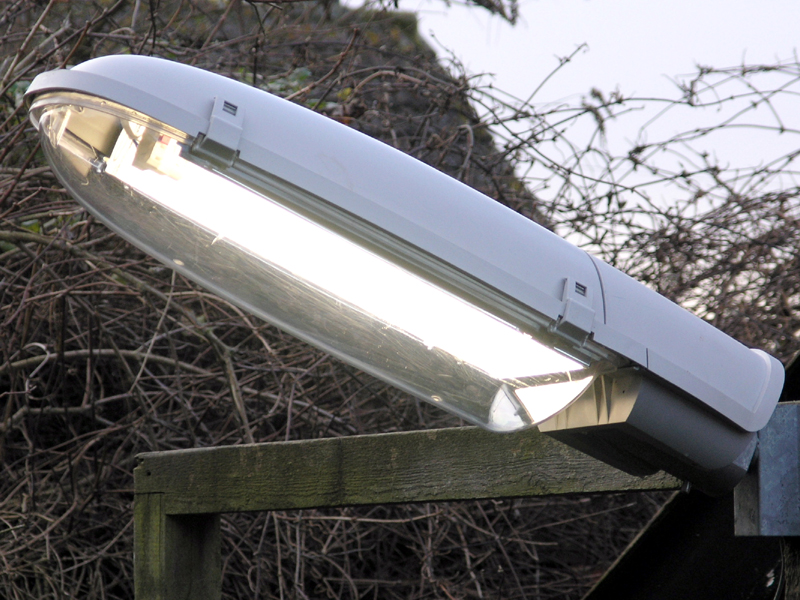
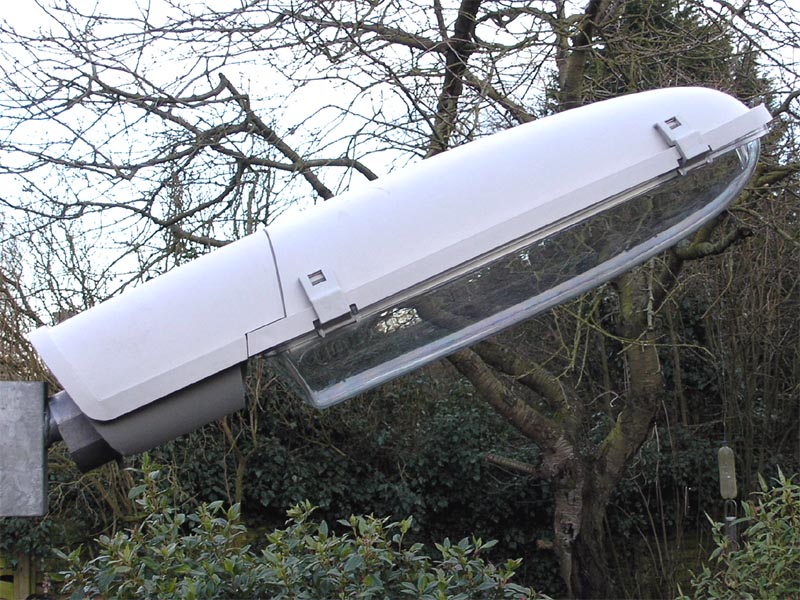
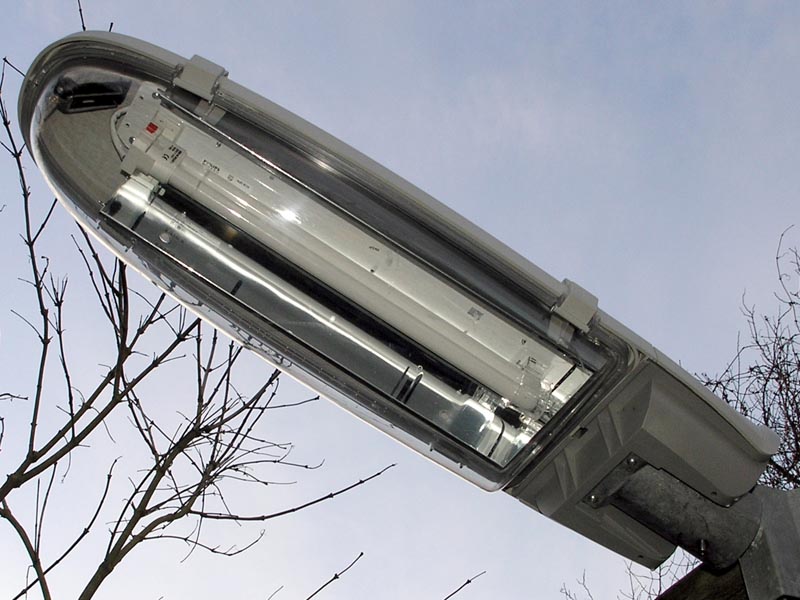
facing profile
Darren gave me this lantern which was installed somewhere in the
Northampton area. It looked like it hadn't even been installed, but there was a cropped service
cable inside, showing it had been wired up at some point in the past.
|
|
|
|
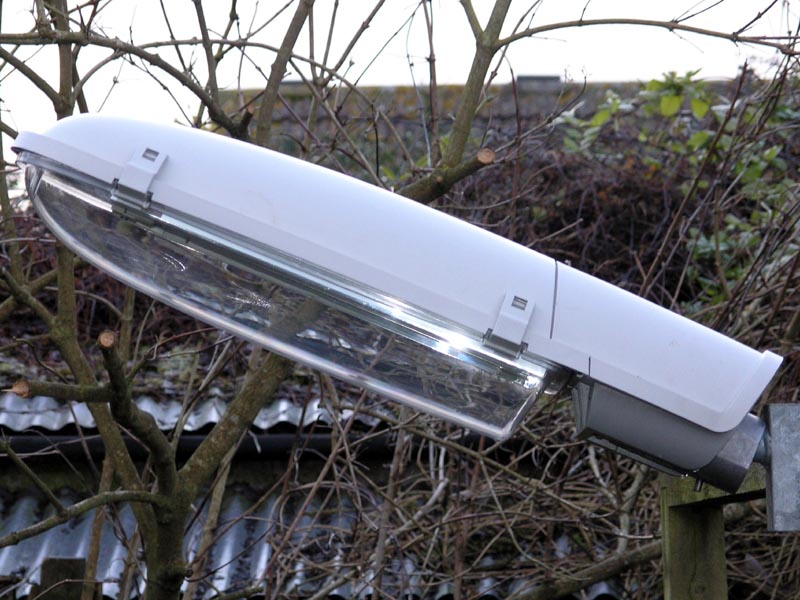
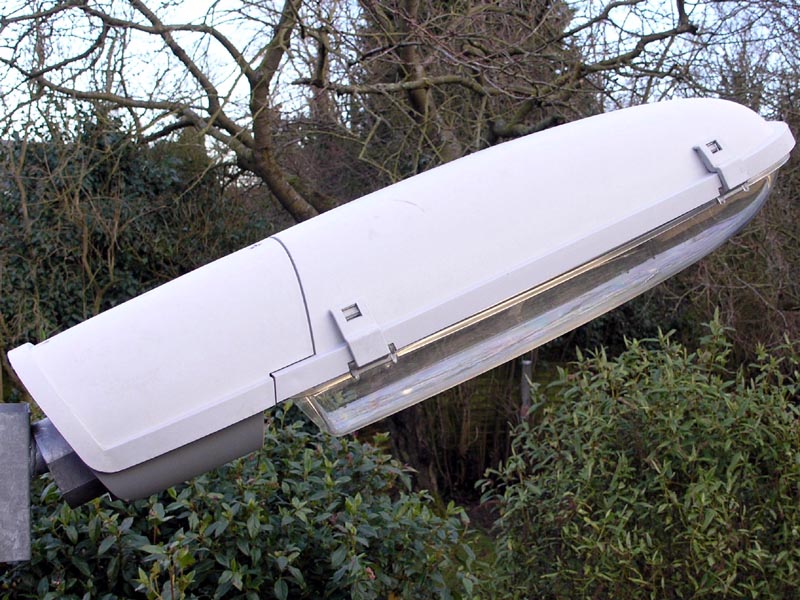
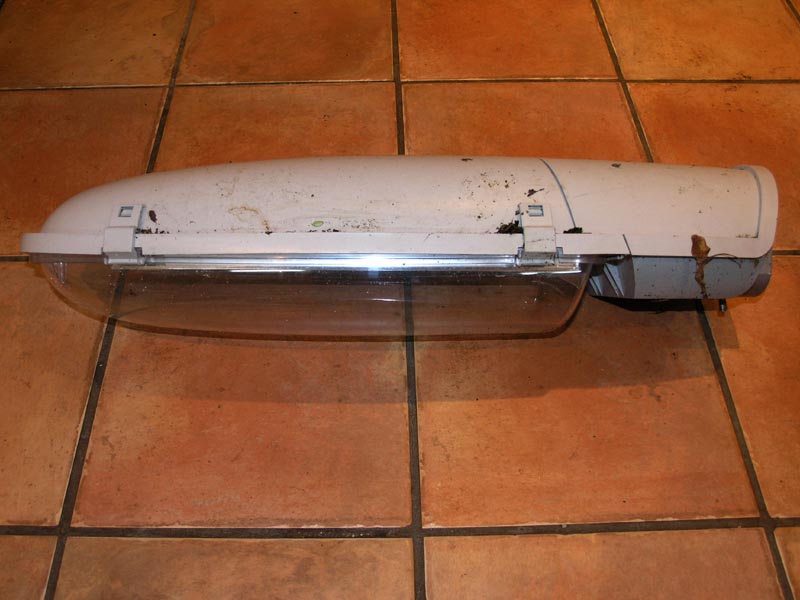
front profile
Despite some scratches on the bowl (which can just been seen in this shot), the lantern
is almost mint.
|
|
|
|
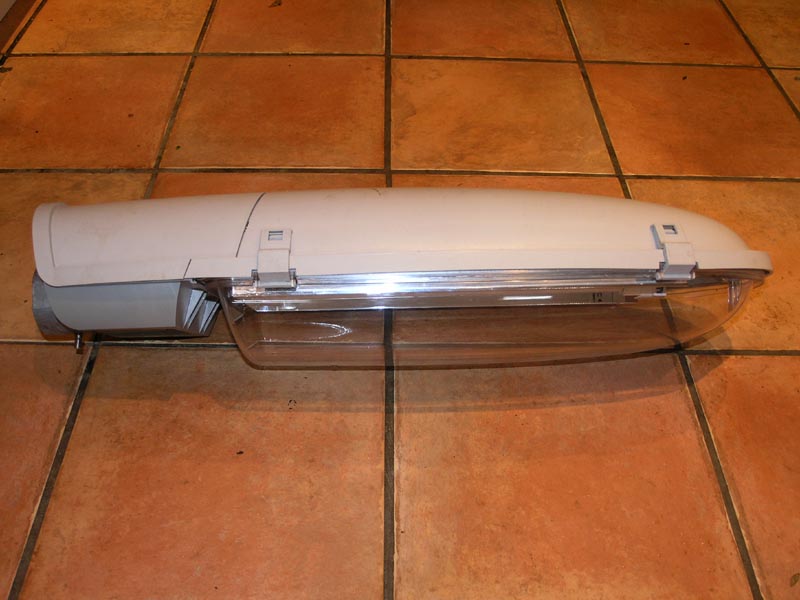
trailing profile
The lantern is constructed from two interlocking parts. The lantern half includes the gear,
optical system, bulb and bowl.
|
|
|
|
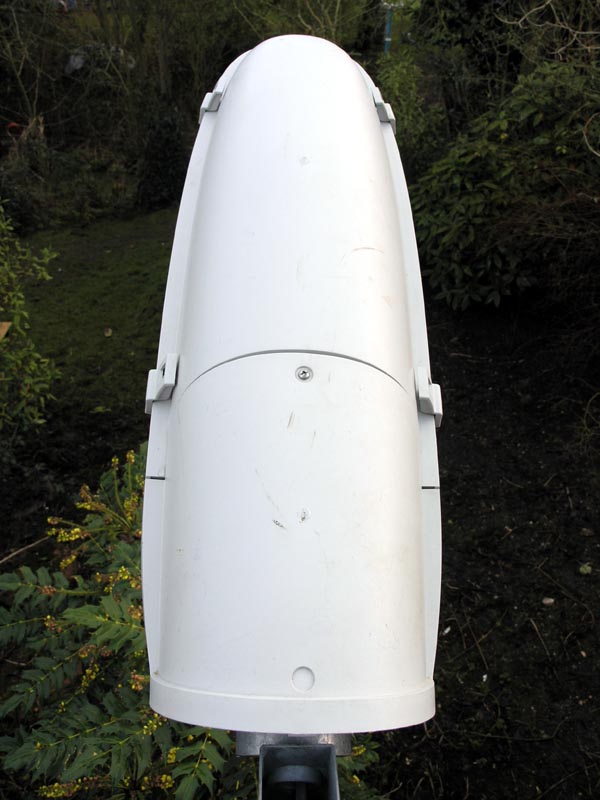
side & canopy
The other half includes the spigot which in this instance
is for side entry mounting; a post-top mounting option is also available. An additional photocell
option can be installed on the top of the spigot side if required.
|
|
|
|
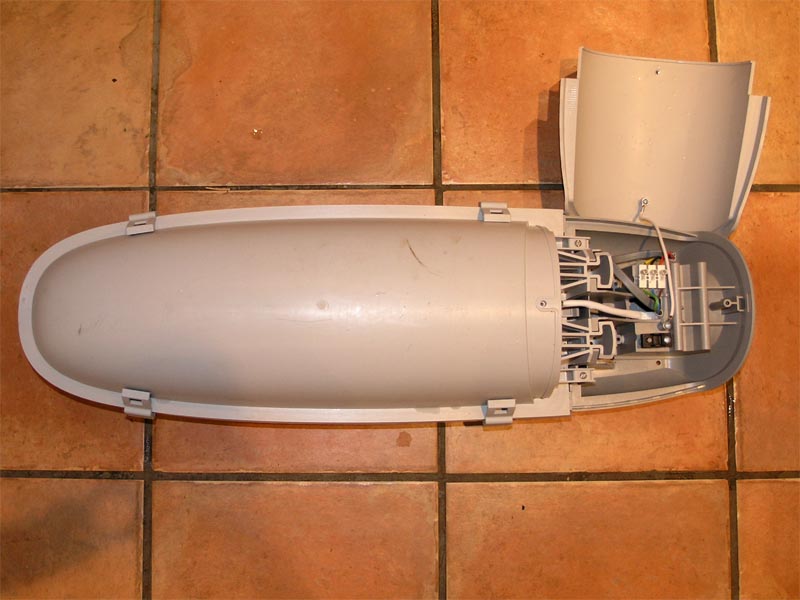
canopy
By unscrewing the Philips screw, the top of the canopy lifts off to reveal the terminal block. The
lantern wiring passes through a bulkhead into the lantern half; the wiring is completely sealed into
the bulkhead to preserve the IP66 rating of the lantern compartment.
|
|
|
|
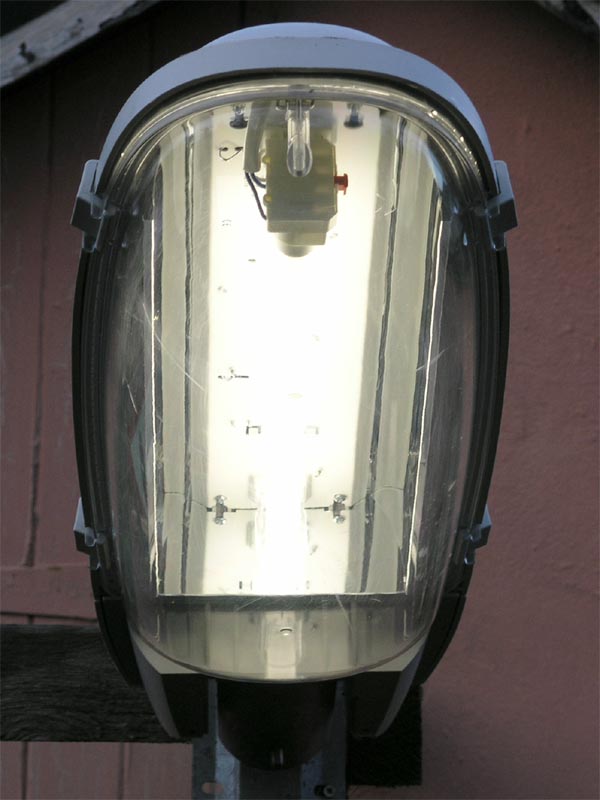
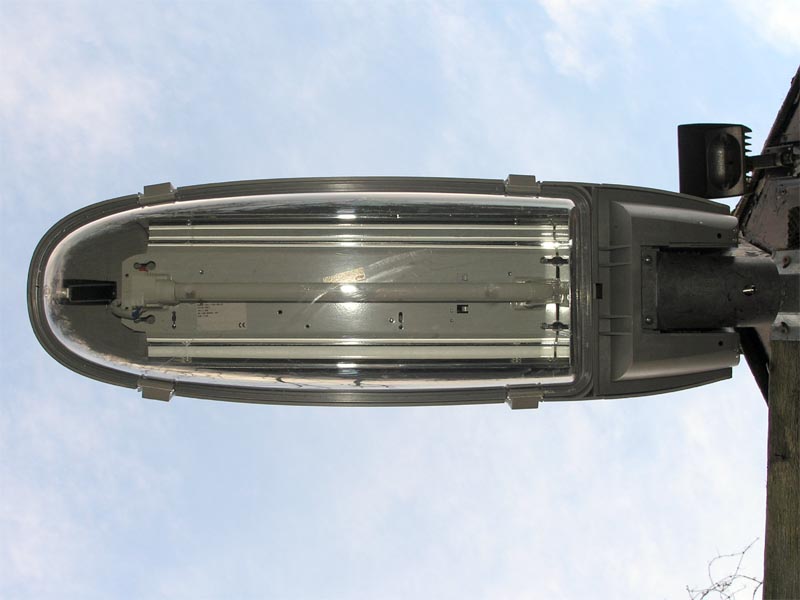
vertical
In this view, the position of the bulb and two reflectors can be seen.
|
|
|
|
pedestrian view
The optical system comprises a centrally high mounted bulb and two polished reflectors which produce a
cross-over cut-off distribution. The electronic gear is mounted on a gear tray in the canopy of the
lantern; the underside of this is painted white to act as a secondary diffuser which directs light
emitted above the horizontal back down towards the road surface.
|
Philips Residium FGS 224 - During Restoration
The lantern had been stored in the garden for a couple of years and had suffered from mud and falling
leaves. However, the inside appeared bright and clean, thanks to the lantern's IP66 rated sealed lamp compartment.
A quick wash with warm water and the lantern was back to its former glory.
Unscrewing the Philips screw on the top of the lantern revealed the cable entry compartment, complete
with terminal block. Two lugs held the cable entry compartment onto the lantern; this allowed different
cable entry compartments with either post-top or side entry spigots to be slotted onto the same lantern
body.
The bowl was removed by undoing the four plastic clips. A rubber gasket was loosely fitted to the
plastic bowl; this was squeezed into position when the clips were engaged. Internally the lantern
was clean and bright. It looked like it had never been in service.
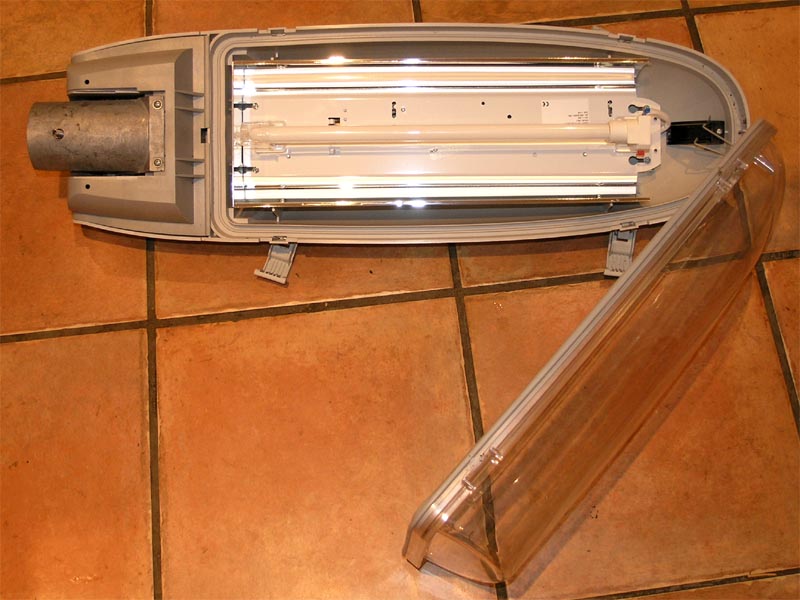
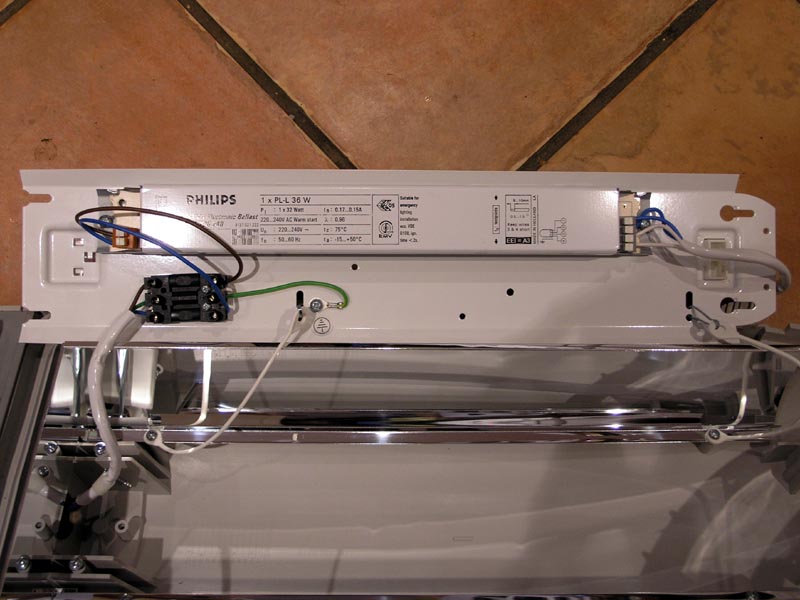
Loosening the four Philips screws holding the white over-reflector and side relectors allowed it to be
slid out and removed. On the other side was a Philips HF Performer
electronic ballast for 36W PL-L lamps.
Because I'd never serviced one of these lanterns before, I ended up taking out the screw securing the
cable tie before I could get access to the electronic gear. However, I soon realised that the black
terminal block was actually a connector which could be pulled apart. This allowed the whole over reflector
assembly to be easily removed and replaced; so faulty gear could be taken back to the depot easily and
quickly.
The whole interior was perfectly clean so it was all reassembled.
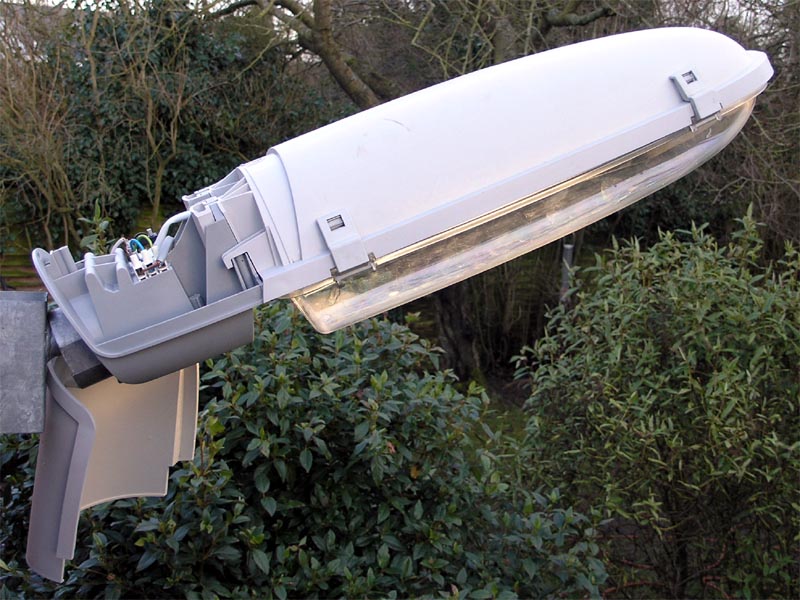
Mounted on an angled bracket, the naturally angled side-entry spigot of the lantern added to
its jaunty angle. It was quickly wired up and powered up perfectly.
|