 |
Urbis Aramis 1A
Genre: Globe lantern
Since the earliest days of lighting, the glare from a point light source could always be
softened and reduced by means of a diffusing globe or sphere. Although the gentle light
produced by the early gas lanterns never merited any diffusing glass, the arrival of
the arc lamps necessitated huge opaque glass globes required to soften and spread
the piercing light of the electric arc.
When the incandescent bulb arrived, some exterior lanterns offered a choice of either
clear flint glass or opaloid glass, but the function of the lantern was still to protect
the bulb(s) and provide an even symmetrical distribution of light. It wasn’t until the 1920s,
the scientific foundations of street lighting, and the development of directional lanterns,
that the globe lantern fell from favour as a general street lighting lantern.
It was relegated to the back of catalogues as a "decorative" lantern. By the 1930s,
the globe lantern was pushed into service on elegant columns and brackets, as a focal
point on bridges, boulevards, public spaces, parks and other open areas. Its optical
control was limited to just its diffuser bowl.
During the austere 1950s, it had all but disappeared from the manufacturers catalogues
and it certainly didn’t fire the imagination of the design conscious 1960s. (Its two main uses
being limited to the orange globes of Belisha Beacons and the white sphere of the refuge island lantern).
But, it reappeared in the 1970s; companies such as the GEC and Phosco
placed their street lighting optical systems within the globe itself, thus embellishing the
lantern with modern street lighting optics whilst maintaining its classical daytime appearance.
Other companies also jumped on the bandwagon, but simply returned to the old idea of placing a
bare lamp in a spherical diffuser.
The spherical lantern is still popular, but today’s push for ever more efficient lanterns and
strict control of light means the upper hemisphere of the lantern isn't illuminated in modern
versions. Therefore its daytime appearance doesn't match its night apperance. It remains
to be seen if authorities will continue favouring this version of the globe lantern.
Name: Urbis Aramis 1A
Date: Circa Mid 1980s -
Dimensions: Length: 672mm, Height: 439mm
Light Distibution: SealSafe 1200, 1312, 1543 system. Conforms with BS 5489-1 / EN 13201.
Lamp: 50-150W SON (metal halide, mercury vapour and white sodium also available).
History
 It isn’t known when the Urbis Aramis range of lanterns entered production,
but a guess of the 1980s wouldn’t be far off as the lantern featured Urbis’ SealSafe
reflector technology. Additionally the banded sphere lantern type became fashionable again in the
1980s, appearing in high streets, shopping centres, car parks and other large, civic areas.
It isn’t known when the Urbis Aramis range of lanterns entered production,
but a guess of the 1980s wouldn’t be far off as the lantern featured Urbis’ SealSafe
reflector technology. Additionally the banded sphere lantern type became fashionable again in the
1980s, appearing in high streets, shopping centres, car parks and other large, civic areas.
Initially the lantern was called the Aramis Sealsafe thus emphazing the use of the
reflector optical system.
Urbis provided three basic variants of the lantern: the Aramis 1 series
featured a round lower globe; the Aramis 2 range had a flattened dish bowl; and
the lone Aramis 3 was fitted with flattened glass.The ranges were expanded
with several different shaped upper hemispheres, and the lantern bodies could be specified in
any colour from the British Standard or RAL range.
The earlier lanterns (such as the Aramis 1A in my collection) featured
polycarbonate upper globes. These could be illuminated by an optional extra called
the Top Glow - a hole made in the top of the Sealsafe reflector, sealed
with a diffuser. This option was removed in later lanterns as they used spun aluminium canopies.
Popularity
As it is primarily decorative, the Urbis Aramis is limited
in its application, although it appears to be widely installed where decorative lanterns are
required.
Identification
No external Urbis logos can be found on the lantern (although there's plenty
of stickers inside the lantern canopy to positively identify it). But the lantern can be
identified by its metal band which is slightly thicker at the bracket end of the lantern, tapering
slightly as it reaches the other end of the lantern. Other competitors feature either
bands of uniform thickness or different shaped bowls.
Optical System
The lanterns optical systems were based on the SealSafe 1200, 1312 and 1543 reflectors. These were
designed for 50-150W SON-T bulbs, although the lantern could also take metal halide, mercury vapour
and/or white sodium lamps.
The Urbis Aramis 1A In My Collection
|
|
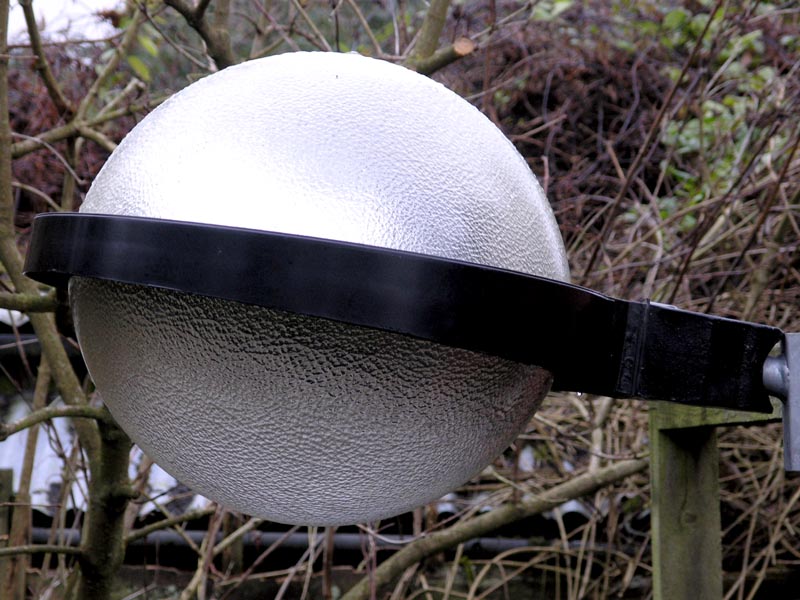
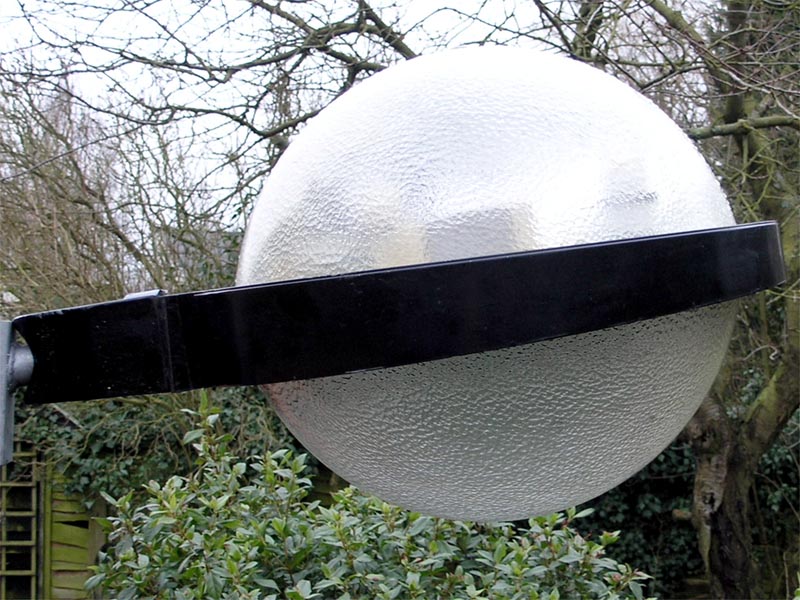
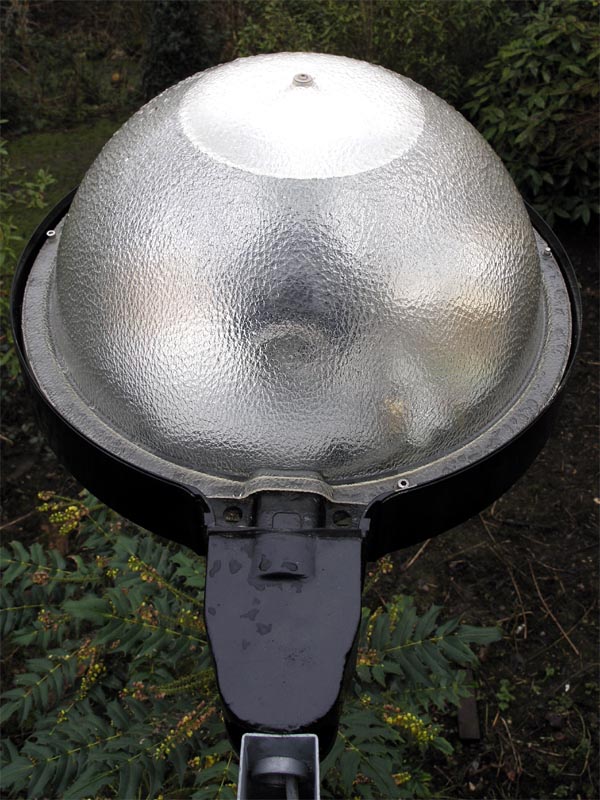
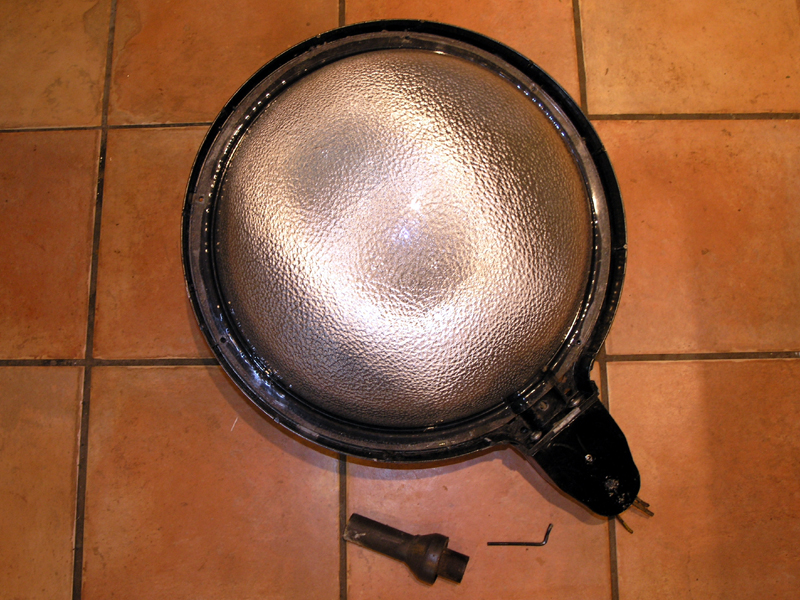
facing profile
Darren gave me this lantern which was installed somewhere in the
Northampton area. It was in extremely good condition after several years of service.
|
|
|
|
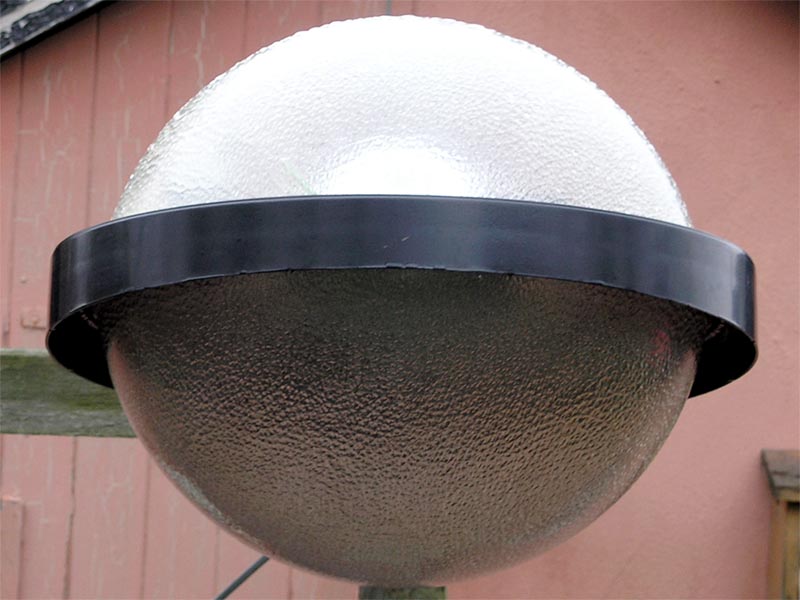
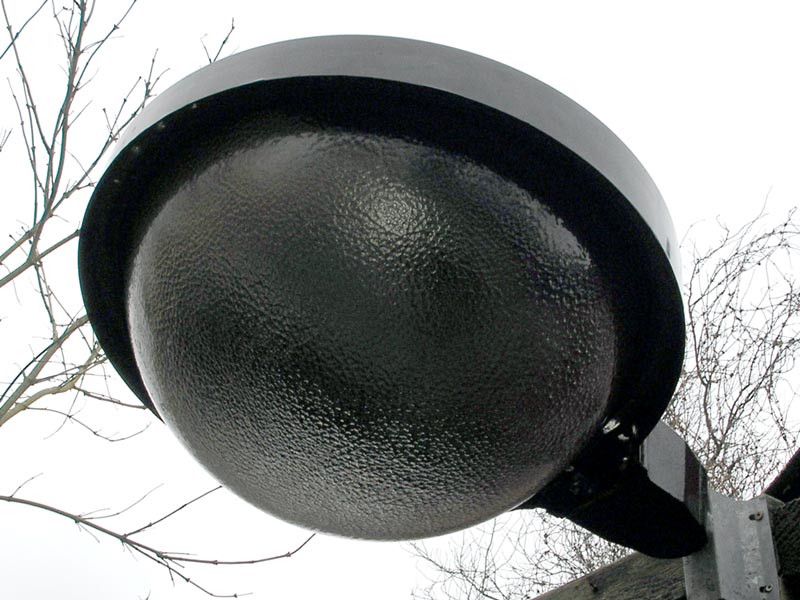
front profile
Despite some peeling of the black paint on the underside of the bracket support,
the lantern had weathered the years well.
|
|
|
|
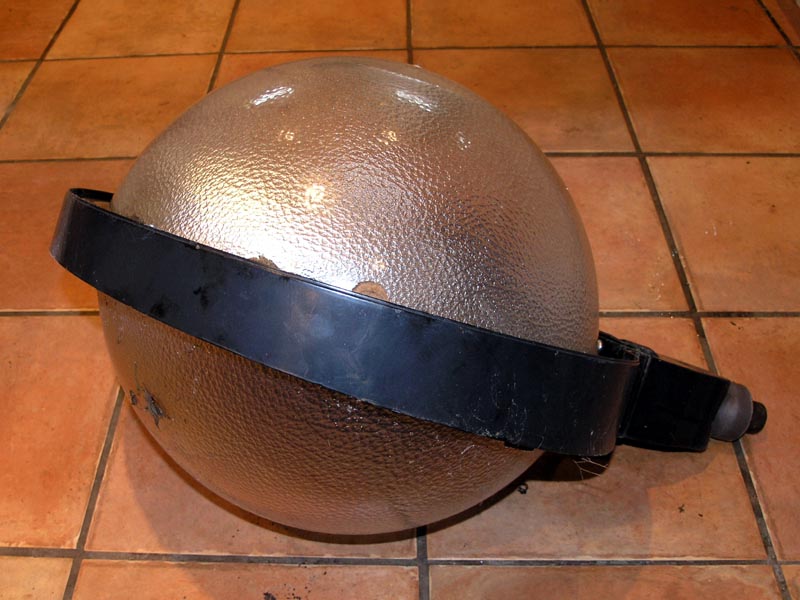
trailing profile
The lantern body comprises a flat, circular piece of aluminium around which is
attached a metal band. A separate component for spigot mounting is bolted
to the back of the lantern assembly and two plastic diffuser bowls are screwed
to either side of the body. The SealSafe optic and gear tray are
mounted in the upper half of the lantern with the lower hemisphere free for light distribution.
|
|
|
|
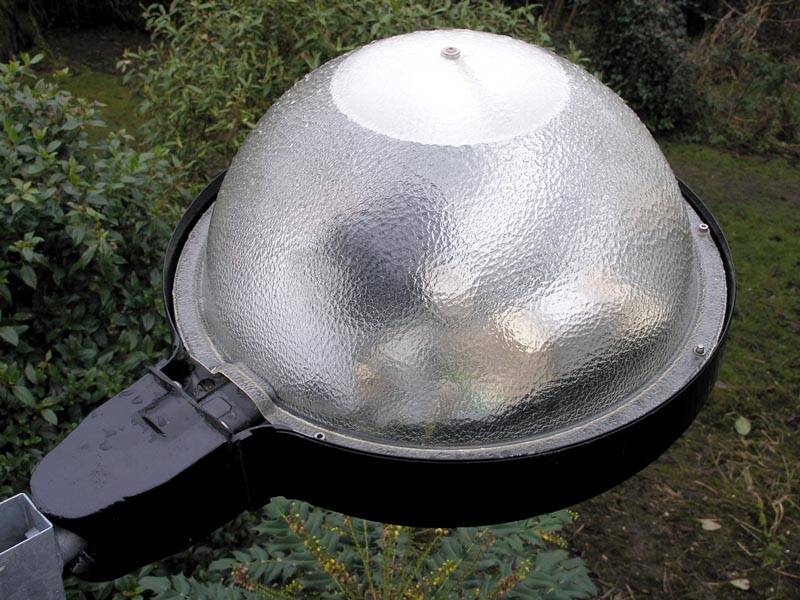
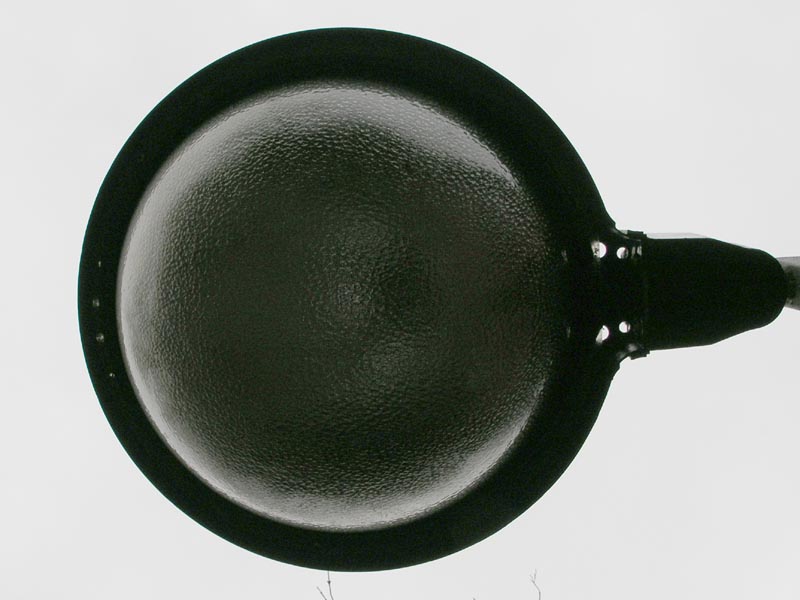
canopy
The top of the lantern is covered by a plastic diffusing sphere. It is held in place
by three Allen keys. Any rainwater collected in the rim and will flow down to the spigot
attachment where it drains away through four holes drilled through the lantern body.
|
|
|
|
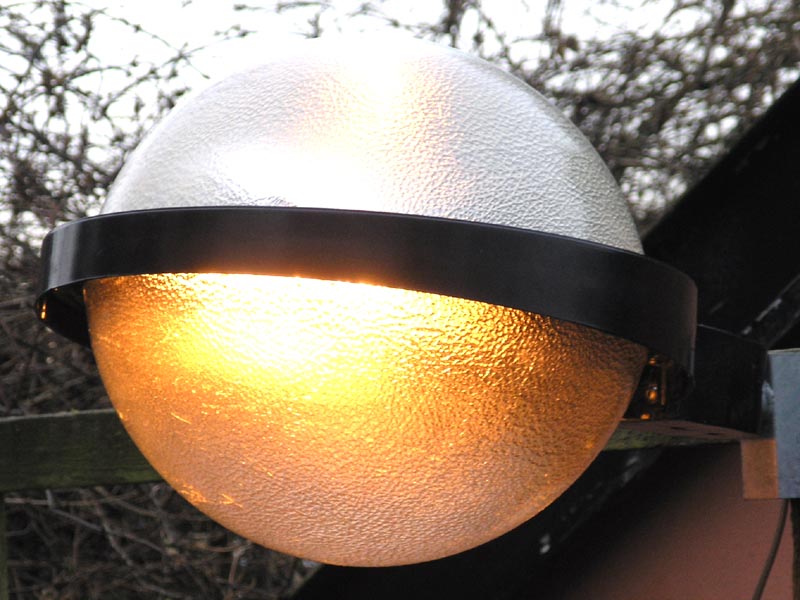
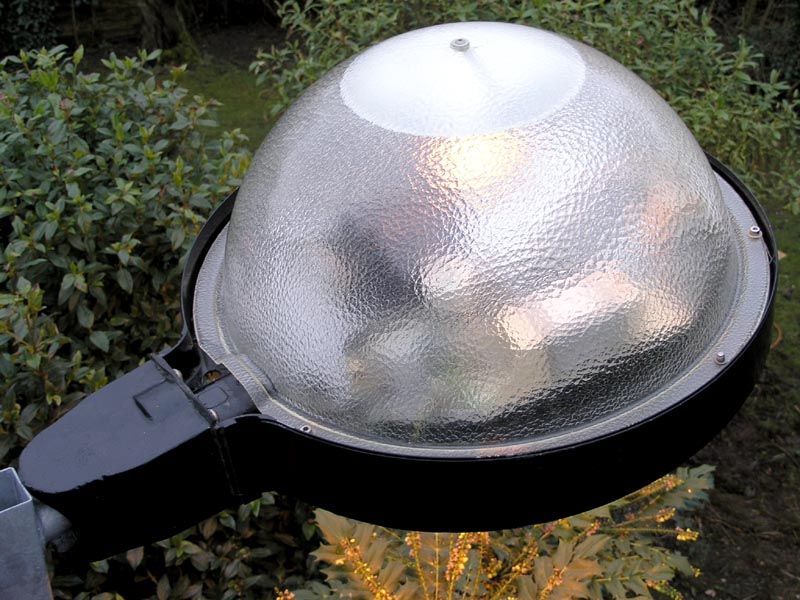
canopy: lit
The top sphere is not just a decorative feature. When powered on, a small amount of
flux is emitted inside the top hemisphere to gently illuminate the top of the lantern.
A stainless steel reflector mounted inside the top of the globe redirects the flux back
out through the sides of the bowl.
|
|
|
|
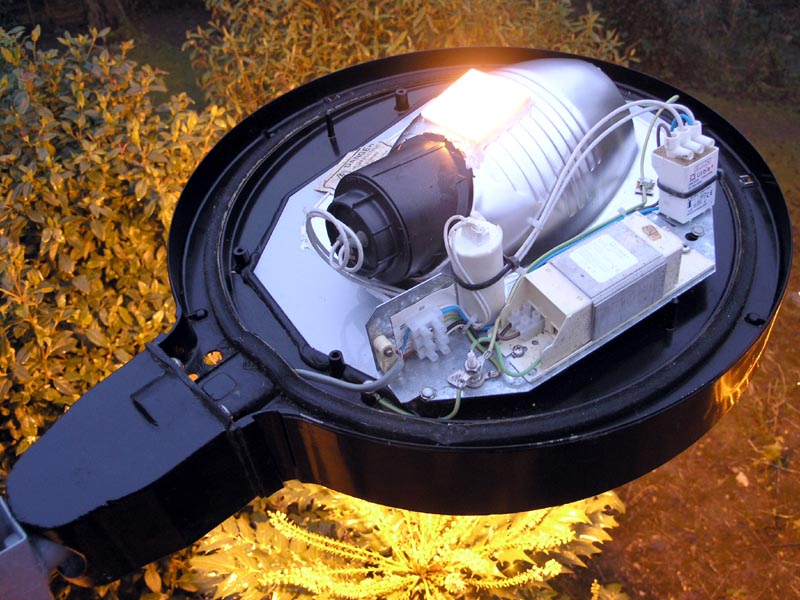
canopy: open
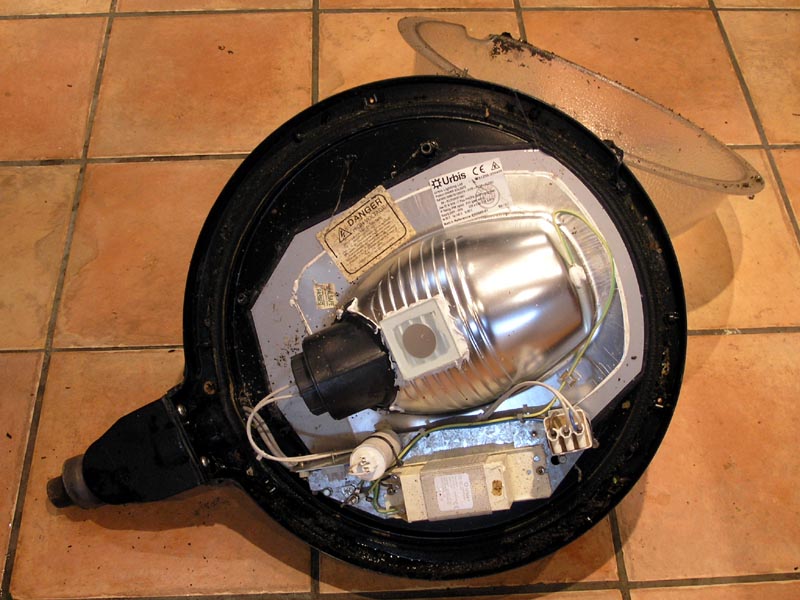
With the top cover removed, the modification to the SealSafe 1200 optic can be seen.
A hole has been made in the top of the optic with a square diffuser panel stuck over the top.
This allows a small amount of light to illuminate the top half of the lantern thus giving
the impression of an entirely illuminated globe of light. This was the optional
Top Glow feature provided by Urbis.
Note how this is an older version of the lantern. The gear tray is bolted in place
(in later versions it is removable) and the ballast and ignitor feature the old Urbis logo.
Additionally modern versions of the lantern have spun aluminium canopies and don't emit light from
the upper hemisphere - so the Top Glow feature was withdrawn.
The ballast is an Urbis HSG07024521 (70W 1A HPS) thermal cut-off unit
and the ignitor is an Urbis PXE070255 for 35-70 HPS lamps.
The markings on the capacitor have rubbed off over the years and cannot be read.
|
|
|
|
canopy
This view of the lantern clearly shows the overhead reflector fitted inside the
bowl and the three allen screws holding the top bowl firmly in place.
|
|
|
|
vertical
In this view, the four holes to allow water drainage can clearly be seen.
|
|
|
|
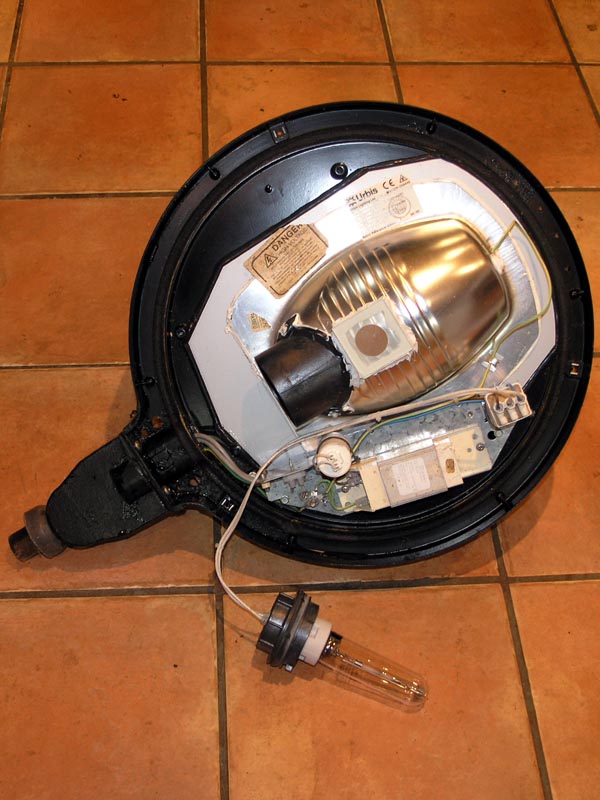
pedestrian view
The bottom globe is stuck in position to maintain the high IP rating of the optical chamber.
Bulb changing is therefore achieved by removing the top hemisphere and accessing the bulb
by releasing it from the SealSafe optic (it’s similar to a bayonet connector
and just requires a twist to remove it.)
The lantern is essentially a SealSafe optical system enclosed within a diffusing sphere.
|
Urbis Aramis 1A - During Restoration
The lantern had been stored in the garden for a couple of years but wasn't too dirty. From the
exterior, the lantern didn't require much restoration and the interior appeared clean and dry.
Removing the three allen keys allowed the top hemisphere to be removed. This revealed the gear tray
(Urbis gear for 70W SON lamp) and the top of the SealSafe optic.
Whilst the bottom hemisphere appeared to be held in place by three Philips screws which were easily
removed, the plastic bowl wouldn't budge. I believe it's been glued in place, thus ensure the
IP rating of the SealSafe chamber.
Access to the bulb is by twisting the bulb holder (which works like a large bayonet connector).
After another clean, the lantern was already looking much better.
The next job was to get the old bracket off the lantern. (Darren simply sawed through
the bracket when he removed the lantern leaving a stub attached). The allen grub screw nearest the
lantern unscrewed with lots of penetrating oil and using a pipe to add leverage to the allen key; the
furthest one wouldn't budge and I ended up bending the allen key.
Heat didn't work either so there was nothing for it - I drilled it out. Once removed, the bracket stub
simply pulled out.
The remaining stub of the grub screw was removed using a cold chisel and hammer. There was still some
bits left in the thread of the hole, so this was removed using a tap-and-die set to cut the
threads.
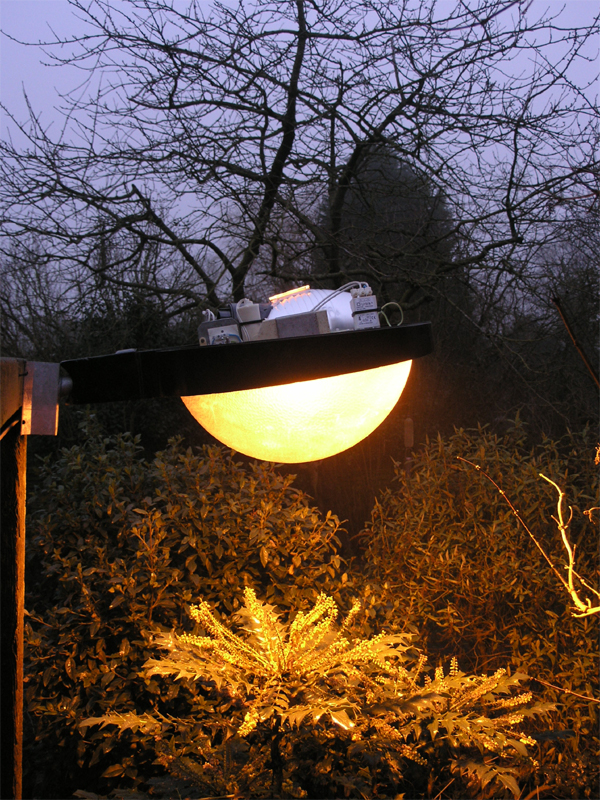
The lantern was then mounted on a bracket to have its pictures taken. Whilst it was still partly
disassembled, it was a good opportunity to test it and make sure it all worked. Which it did.
|